SwiftUIでサイン波の音声を生成し再生する方法を説明する。
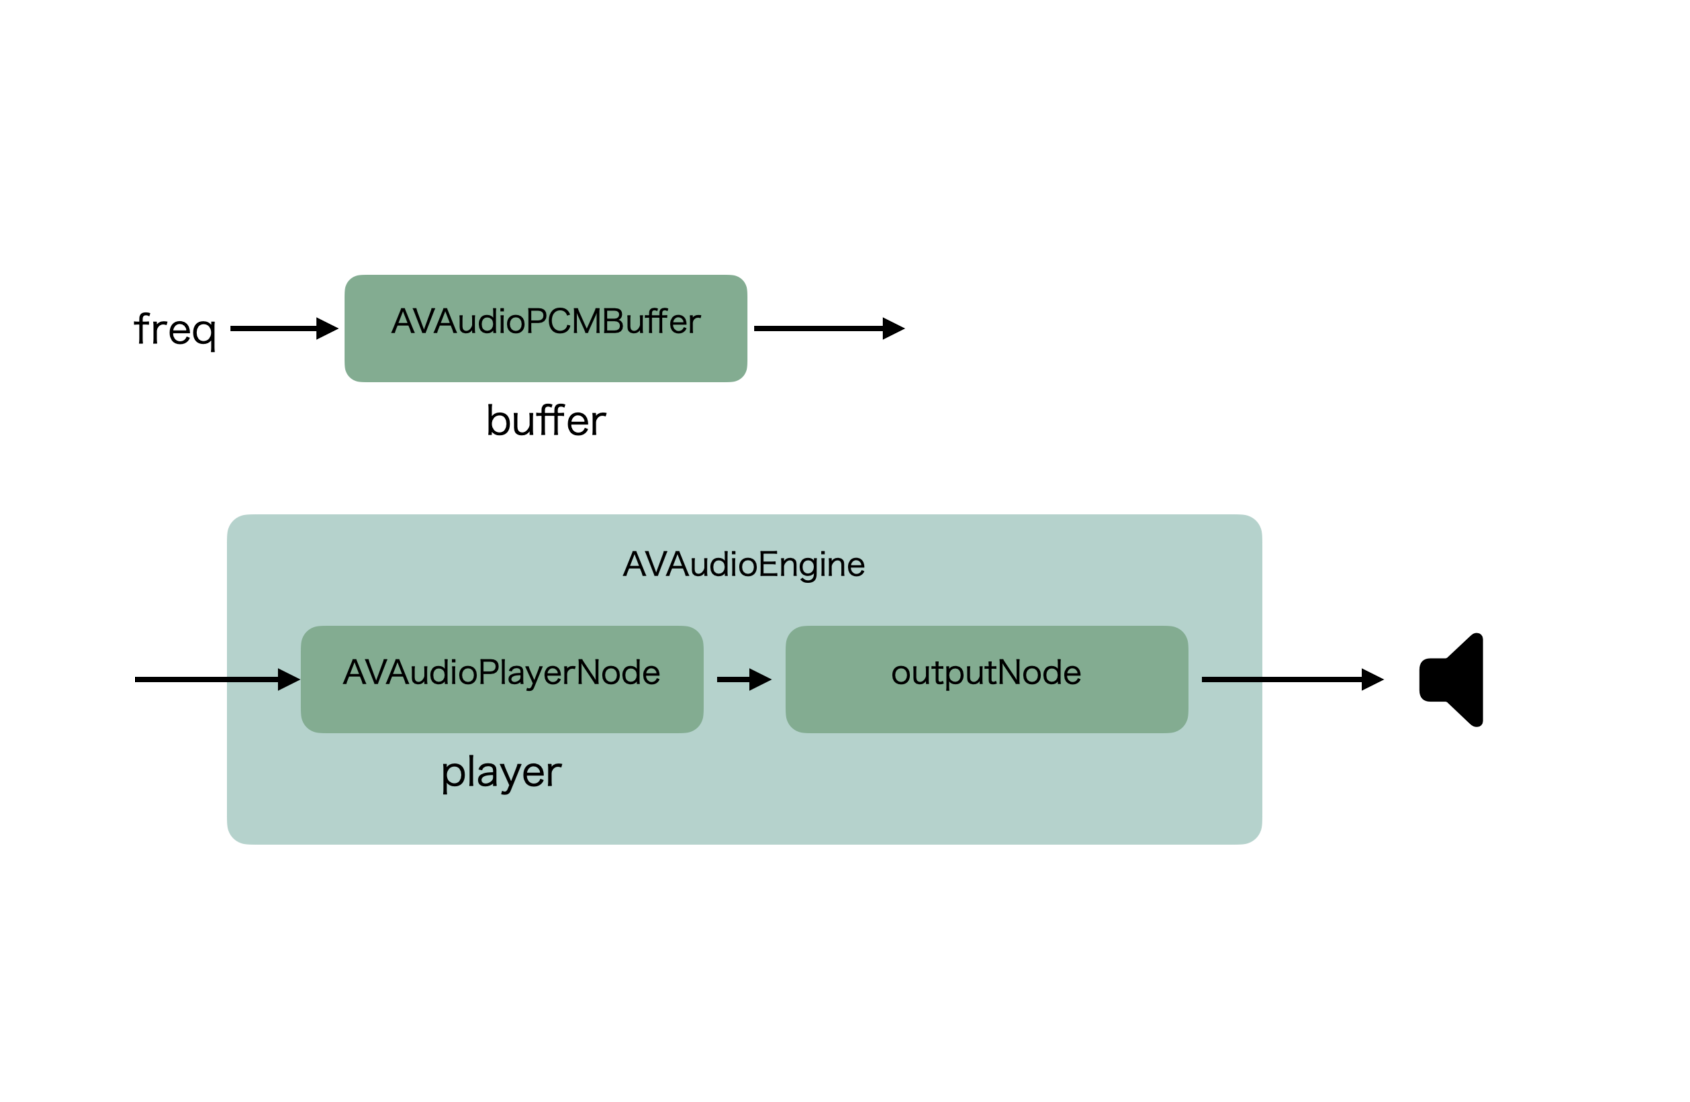
全体像
- bufferは受け取った周波数(freq)のサイン波を生成する。
- playerはbufferから受け取ったサイン波outputNodeを経由して再生する。

コード
- AVAudioEngineとAVAudioPlayerNodeを生成する。
- AVAudioPCMBufferを生成する。
- AVAudioEngineにAVAudioPlayerNodeを接続する。
- outputNodeを接続する。
- 再生する。
import Foundation
import AVFoundation

class SoundUnit {

    let volume: Double = 1.0
    let sampleRate = 44100.0
    let bufferTimeLength: UInt32 = 5  // sec

    private let audioEngine = AVAudioEngine()                             // 1
    private let player = AVAudioPlayerNode()                              // 1
    let session = AVAudioSession.sharedInstance()

    init() {

    }

    deinit {
        stopSound()
    }

    private func makeBuffer(freq: Double) -> AVAudioPCMBuffer {
        let audioFormat = AVAudioFormat(
            standardFormatWithSampleRate: sampleRate,
            channels: 1
        )
        guard let buf = AVAudioPCMBuffer(                                 // 2
            pcmFormat: audioFormat!,
            frameCapacity: AVAudioFrameCount(sampleRate) * bufferTimeLength
        ) else {
            fatalError("Error initializing AVAudioPCMBuffer")
        }
        let data = buf.floatChannelData?[0]
        var theta = 0.0
        let deltaTheta = 2.0 * .pi * Double(freq) / self.sampleRate
        let numberFrames = buf.frameCapacity
        buf.frameLength = numberFrames

        for frame in 0..<Int(numberFrames) {
            data?[frame] = Float32(sin(theta) * volume)

            theta += deltaTheta
            if theta > 2.0 * .pi {
                theta -= 2.0 * .pi
            }
        }

        return buf
    }

    func startSound(freq: Double) {
        try! session.setCategory(AVAudioSession.Category.playback)
        try! session.setActive(true)

        let buffer = makeBuffer(freq: freq)
        audioEngine.attach(player)                                        // 3
        let audioFormat = AVAudioFormat(
            standardFormatWithSampleRate: sampleRate,
            channels: 1
        )
        audioEngine.connect(player, to: audioEngine.outputNode, format: audioFormat)
                                                                          // 4

        audioEngine.prepare()
        try! audioEngine.start()

        if !player.isPlaying {
            player.play()                                                 // 5
            player.scheduleBuffer(
                buffer,
                at: nil,
                options: .loops,
                completionHandler: nil
            )
        }

    }

    func stopSound() {
        if player.isPlaying {
            player.stop()
        }
        if audioEngine.isRunning {
            audioEngine.stop()
            try! session.setActive(false)
        }
    }

}
使い方
例えばContentView.swift内にSoundUnitクラスのインスタンスを生成し、
let soundUnit = SoundUnit()例えば440Hzの音を鳴らしたい場合はstartSound(freq: 440)と書く。
soundUnit.startSound(freq: 440)応用
周波数を決める部分には下記記事の技術を利用してもよい。
下記iOS Appでは本記事の技術を利用した。
メモ
ループ再生時のループのつなぎ目でプツッというノイズが発生する場合がある。
周波数freqが整数でない場合に発生する。
原因は、ループの始めと終わりのサイン波の大きさが異なるため。ループの始めのサイン波の大きさは常に0。ループの終わりはサイン波の大きさは周波数が整数なら0、整数以外なら0以外になる。よって周波数が整数以外のときにループのつなぎ目で音が非連続に変化してしまう。
対処案は、
- 周波数を整数にする。
- ループの時間を超えないような短い音だけで使う。
- ループの時間を長くしてノイズの発生頻度を下げる。
- この方法は使わずにループの始めと終わりの大きさが同じ音声ファイルを作って使う。
環境
Xcode 13.3, Swift 5.6
まとめ
SwiftUIでサイン波の音声を生成し再生する方法を説明した。


コメント